Mostrando entradas con la etiqueta labeling. Mostrar todas las entradas

lunes, 23 de septiembre de 2019

Family in the House for ESL learners

LINK:https://www.teacherspayteachers.com/Product/Family-Flashcards-worksheets-and-more-for-Elementary-ESL-students-4841832 

It is available in my other store:
Watch the video of the complete resource:

Review the rooms in the house with the flashcards.
Familie Family in the house flashcards

Use the House and the family flashcards to make a grid that can look like a house on the board.
Teacher: Who is she?
Student: She’s Mother.
Teacher: Where is she?
Student: She’s in the bathroom.
Teacher: Is uncle Tom in the bedroom?
Student: Yes, he is.
Teacher: Where is Brother?
Student: He’s in the dining room.
Teacher: Who is in the living room?
Student: The cousin is.
Say a place and the students say the family member and then do the opposite.
Teacher: kitchen!
Student: Grandma!

Model and have students make plural sentences.
Teacher: The cousins are in the bathroom.
Student: The brothers are in the bedroom.
Teacher: Who are in the dining room?
Student: The aunts!
Teacher: Where are the babies?
Student: They are in the living room.

I made this craft house to use for speaking purpose using prepositions.

It comes in two parts to make a bigger house to display to the class.
Use it to make sentences with prepositions. Assemble one or several houses for the class.
Teacher: Put the brother in front of the house. Put the uncle next to the house. Put the mother next to the house.

I opened the windows and doors to review more prepositions.
Teacher: Where is the cousin?
Student: He is behind the window.
Teacher: Where is the cousin?
Student: She is in the house.

Students can make sentences: Brother is in front of the house. Mother is next to the house. Grandpa is between Mother and Grandma.

              Print the Rooms in a house to use with the family members.

I made a house out of file folder. It is easier to carry around and play.  
Label the rooms in the house. (LABELING)


The family members are in the house. Dictate where the members are.
Teacher: Aunt is in the bedroom. The cousin is in the bathroom. Grandma is in the living room. Father is in the dining room. The baby is in the kitchen.
Ask questions:
Teacher: Where is the cousin?
Student: She’s in the bathroom.
Teacher: Who is in the living room?
Student: Grandma is.

I made small word cards to make sentences.
The video!

                                            A worksheet for many activities.
The house can be colored by room.
Teacher: Color the bathroom blue. Or it can be colored by objects in the house. Dictate where to place the family members in the house. Do this as a listening activity.
The house can be colored by objects in the house.

It can be done as a writing activity on the notebook.

Follow me at my Facebook group!!   https://www.facebook.com/ESLPreschoolTeachers


viernes, 9 de agosto de 2019

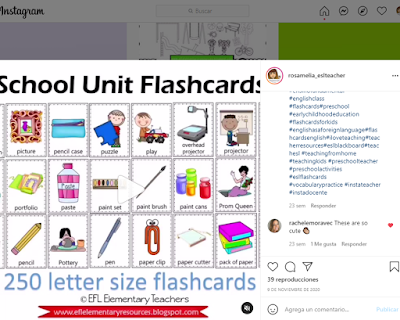
School unit flashcards for ESL students


I updated the school unit flashcards. I thought that adding more words and using nicer clipart would be a bonus for teachers. Many of you have bought it and now you will have both versions. If there are words that you would like me to add, let me know.

More than 250 flashcards for the classroom objects on this resource and just a few tips on how to use them in class. You can use my flashcards or the ones that come with your book series.Link: 
https://www.teacherspayteachers.com/Product/School-Theme-Flashcards-for-ELL-836917
Use the flashcards to present the school objects vocabulary.
school objects flashcards
Check the flashcards:

Watch the video using the flashcards.

Flashcards 1. If your students are a little more advanced review there is and there are. Divide the board in two and write the phrases. I used pencil and books.
Teacher: There is a pencil. There are books.
Students can find more flashcards to make more examples.
Flashcards 2. I always find labeling fun. You can do one the board as an example. Label the body parts, clothes and school objects.(Labeling)
Teacher: name the body parts.
Students: mouth! Eyes! Leg!
Teacher: name the clothes.
Students: dress! shoe!
Teacher: name the school objects.
Students: lunch bag! backpack!
Then, assign red for body parts. Ask students to name all the body parts and you circle them. Do the same for clothes and school objects.
Students can do the same using the flashcards. I placed the flashcard into a plastic sheet to go on paperless. Have the students use a blue whiteboard marker for labeling the body parts.
Then, use a black whiteboard marker for labeling the clothes and the school objects.

Flashcards 3. Select a letter of the alphabet and have the students say all the words that start with the letter. As they name the word place the flashcard on the board. Then, have the students do the same on their notebooks with another letter. I chose letter P for this example.
Flashcards 4. Order alphabetically. Write the letters from A to Z on the board and the students find the flashcards to place under each letter.

Flashcards 5. Classroom Monsters. Give a flashcard on a plastic sheet to each student and have them create a monster. I did this one with scissors. I added hair, eyes, nose, mouth, shoes. I guess students are more creative than me, but it will work to show the students the task before they start their own. Students can show their work to the class.
Student: This is my scissors monster. It has black hair. Its eyes are blue and big. It is happy. She is wearing shoes.
Flashcards 6. Sorting the flashcards into categories. I wrote these categories on the board. Students find the flashcards for each category.
Flashcards 7. Name the flashcard. Make a grid on the board using the flashcards. I did this simple one as an example for you.
Teacher: C3!
Students: pencil case!

Flashcards 8. Related words! I placed the pencil case flashcard in the middle of the board. Have the students name all the things that a person can find in a pencil case. As they name the words, place the flashcard or write the word. This is like doing a mind map.
Flashcards 9. Use puzzles when working with the little ones.

                                 This is my Instagram Account.                  https://www.instagram.com/rosamelia_eslteacher/
                                                  Follow me!!


jueves, 25 de abril de 2019

Telling the time for ESL Learners

Here is the link to all the telling the time resources:    https://www.teacherspayteachers.com/Product/Telling-the-time-for-ESL-4532035
                                    Watch the video of the resource:


Start by reviewing the numbers 1 to 60 perhaps. Check my blog post with many ideas for a nice practice.  https://eflelementaryresources.blogspot.com/2019/01/numbers-1-to-100-for-esl-learners-part-2.html
As for my experience I teach both the analog and the digital clock. I made both in flashcards. Leave a comment as in which one you teach the most. 
Make sure that students understand the hands of the clock.
Start with o’clock. Place a random flashcard on the board.
                       Teacher: It’s one o’clock.
                       Students:  It’s one o’clock.
Have the students try with the other flashcards.
Then, place the flashcards in random places around the classroom.  Say a time and have a student go find it.
Teacher: (Patricia). It’s twelve o’clock.
Make a reference to the digital clocks.
Have the students match the digital clocks to the analog clocks.
Continue with more time telling flashcards.

I made a bigger analog clock to place on the board and write the vocabulary next to each number or the digital numbers. Students will create their own clock and words with a smaller worksheet.

Write different times on the board and have the students come to the front and put the corresponding flashcard.

Hand in the worksheet for multiple listening practice. Insert the worksheet into a clear plastic sheet for next use.


Or cut them and place contact paper on each one to write the time.
               And another worksheet for writing practice.


Listening is another skill that show be reinforced for teaching the time.


On the art side of the lesson plan include creating a clock. It will be fun to do an analog clock. Have them decorate their clock as they wish using glitter, sequins and any other decoration. Students can glue the printable onto construction paper, cardboard or fun foam. After cutting the clock hands, they can attach them using a butterfly clip.
Have the students play in pairs using the clock they made.
Student A: It’s a quarter to three.
Student B: (demonstrates using his clock)

           Or do a label the clock. Either digital or analog.


A game. Hand in a small clock and a slip of paper to each student. Have them write the time on the slip of paper. Get all the slips of paper and small cards.  Divide the class into two groups, one with the clock cards and another with the slips of paper. At your signal, students stand up and walk around finding the correct pair.

Dictation using the flashcards. Grab all the flashcards that you want to review and without showing them, dictate to the students the time. They write them down on the down on their notebooks. Then place them on the board and have the students correct their work.
        Match the digital clock and the analog clock cards.

              A worksheet that is game board. Play with dice.

After all this, model a small role play and then have students practice in pairs.
Teacher: Excuse me, What time is it ?
Student A using his clock: It’s three o’clock.
Teacher: Thank you.
Student A: You’re welcome.

Take extra time for teaching: Morning, noon, afternoon, evening, night, midnight. Use the flashcards and the digital cutout clocks. You might want to point out Good morning! And I defined some hours. Usually morning starts at sunrise and night starts at sunset but it varies depending on the country.
Follow me! There is more to come. Leave your comments!