3P's lessons plans

lunes, 9 de septiembre de 2019

Family member’s name, face and emotions for ESL

This is the second part of the family unit resource. All will be one product. LINK: https://www.teacherspayteachers.com/Product/Family-Flashcards-worksheets-and-more-for-Elementary-ESL-students-4841832
family unit resource
It is available in this other store:
Watch the video of the complete resource:

Family members have a name.Use the possessive adjectives to introduce them.
Teacher: Who is this?
Students: Mother!
Teacher: What’s the mother’s name?
Students: Patricia. Her name is Patricia.
Continue with all the family members.
possessive adjectives family members flashcards

Family members have facial features
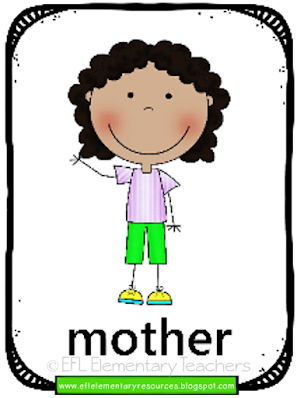
Use the flashcards to describe the parts of the face.
Teacher: Who is this?
Students: Mother!
Teacher: Look at the mother! She has curly black hair. She has black eyes.
                      Family members  facial features flashcards

Insert each flashcard into a clear plastic sheet and using dry erase markers have the students label the facial features.


Students will understand how to use adjectives to express emotions.
I made a set of worksheets that can be done in a group to color in the facial features and the emotions. Each student can do one family member and then present to the class.
adjectives to express emotions worksheets


Or, they can exchange with other students in the group and read. The teacher can start a question and answer session.

Teacher: Who is this?
Students: The aunt!
Teacher: What’s her name?
Students: Her name is Lucy.
Teacher: Does she have brown hair?
Students: Yes, she does!
Teacher: Does she have blue eyes?
Students: No, she doesn’t. She has green eyes.
Teacher: Is she happy or sad?
Students: She is happy!


I also added a smaller set just in case you needed it.
After the little faces are done, you can sort the family members by hair color.
                                          
                                     Or sort by eye color.

Family Unit Pocket charts can be used for reading purpose and have them work in pairs to complete the reading task.Use these to ask yes/no questions: Is this Father?

ask yes/no questions family unit pocket chart

If you do not have a pocket chart, try making the sentences on the desk or a mat.
Make it fun to read using a pointer. I had this old one from the Dollar Tree store.

I found these dry erase cutouts and use it for writing the sentences in the pocket charts.
                       
You can make your own sentences for the pocket charts. I used these strips that I had from the Dollar Store.
Or cut the words and have the students make the sentences.
To end this part of the Family Unit I made a game board.

The golf balls are the markers for each student, I placed a clip behind each ball. The cards are light green (female) or dark green (male) depending if landing on the dark or green part of the game board. Students move along the board as they answer the questions correctly.


               This resource is part of the Family Unit BUNDLE:   https://www.teacherspayteachers.com/Product/Family-Unit-BUNDLE-for-Kindergarten-and-Elementary-ESL-6704385
                                     Follow me!

martes, 3 de septiembre de 2019

Family Flashcards and Worksheets for ESL students

I am working on the family unit resource. Here is the link to this material:   https://www.teacherspayteachers.com/Product/Family-Flashcards-worksheets-and-more-for-Elementary-ESL-students-4841832
                                 
                             Watch the video of the complete resource:

Flashcards are great for introducing vocabulary. There are many things that you can use them. I made three sets of families. Two in English and one in Spanish. There are lots of dual language teachers that need resources and let’s see if these are helpful.

Grids are useful for students to focus on the new family vocabulary. Do it on the board by drawing a grid and placing the family members in random order.
Teacher: Who is in B2?
Students: Father!
Teacher: C3!
Students: aunt!
Point to the flashcards and ask Yes/No questions.
Teacher: Is this the brother?
Students: No, it isn’t!
Teacher: Is this the cousin!
Students: Yes, she is.

Show the students the flashcards upside down and have them identify the family member.

Sort the family members into male or female or boys and girls.

Worksheet 1. First, dictate a color to each family member box.
Teacher: Number 1 is pink.
Teacher: Who is in Number 1?
Students: The cousin!
Then, students complete the sentences.

I see that many teachers love using the notebooks for doing more thing beyond the worksheet. I would cut out each family member and then do a writing practice.
                                         
                                              Worksheet 2.

Writing cards. There are times when we have students that are not quite writing in their own language and a lot less in a new one. Tracing makes it easy for them to get related to the new vocabulary words.

More writing opportunities. Magnetic letters are fun and easy to use. I added a bigger size cards for the family members. Have the students write each word by looking at the writing sheet.

I found this idea and gave it a try. I buy lots of duct tape for many things, but I never thought of using it for writing purpose. I placed a strip of duct tape on top of a page of a notebook. Students can write the words as many times they want and erase it easily. Remember to use a dry erase marker.

Far are the days where the worksheets were put into a folder. I suggest dictating a color for each family word. Cut all the words and pictures from the worksheet and have them glue each picture and word on the notebook.
         
                 The worksheet can be used to play a matching game.


     Follow me at my Facebook group!!   https://www.facebook.com/ESLPreschoolTeachers

viernes, 9 de agosto de 2019

School unit flashcards for ESL students


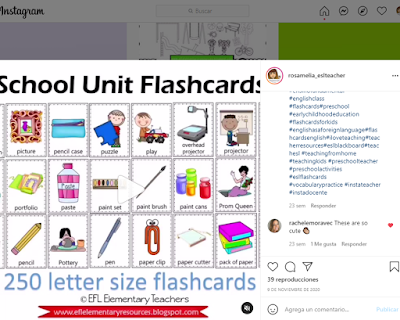
I updated the school unit flashcards. I thought that adding more words and using nicer clipart would be a bonus for teachers. Many of you have bought it and now you will have both versions. If there are words that you would like me to add, let me know.

More than 250 flashcards for the classroom objects on this resource and just a few tips on how to use them in class. You can use my flashcards or the ones that come with your book series.Link: 
https://www.teacherspayteachers.com/Product/School-Theme-Flashcards-for-ELL-836917
Use the flashcards to present the school objects vocabulary.
school objects flashcards
Check the flashcards:

Watch the video using the flashcards.

Flashcards 1. If your students are a little more advanced review there is and there are. Divide the board in two and write the phrases. I used pencil and books.
Teacher: There is a pencil. There are books.
Students can find more flashcards to make more examples.
Flashcards 2. I always find labeling fun. You can do one the board as an example. Label the body parts, clothes and school objects.(Labeling)
Teacher: name the body parts.
Students: mouth! Eyes! Leg!
Teacher: name the clothes.
Students: dress! shoe!
Teacher: name the school objects.
Students: lunch bag! backpack!
Then, assign red for body parts. Ask students to name all the body parts and you circle them. Do the same for clothes and school objects.
Students can do the same using the flashcards. I placed the flashcard into a plastic sheet to go on paperless. Have the students use a blue whiteboard marker for labeling the body parts.
Then, use a black whiteboard marker for labeling the clothes and the school objects.

Flashcards 3. Select a letter of the alphabet and have the students say all the words that start with the letter. As they name the word place the flashcard on the board. Then, have the students do the same on their notebooks with another letter. I chose letter P for this example.
Flashcards 4. Order alphabetically. Write the letters from A to Z on the board and the students find the flashcards to place under each letter.

Flashcards 5. Classroom Monsters. Give a flashcard on a plastic sheet to each student and have them create a monster. I did this one with scissors. I added hair, eyes, nose, mouth, shoes. I guess students are more creative than me, but it will work to show the students the task before they start their own. Students can show their work to the class.
Student: This is my scissors monster. It has black hair. Its eyes are blue and big. It is happy. She is wearing shoes.
Flashcards 6. Sorting the flashcards into categories. I wrote these categories on the board. Students find the flashcards for each category.
Flashcards 7. Name the flashcard. Make a grid on the board using the flashcards. I did this simple one as an example for you.
Teacher: C3!
Students: pencil case!

Flashcards 8. Related words! I placed the pencil case flashcard in the middle of the board. Have the students name all the things that a person can find in a pencil case. As they name the words, place the flashcard or write the word. This is like doing a mind map.
Flashcards 9. Use puzzles when working with the little ones.

                                 This is my Instagram Account.                  https://www.instagram.com/rosamelia_eslteacher/
                                                  Follow me!!