3P's lessons plans

sábado, 21 de febrero de 2015

Calendar: Days and Months

Link to the Calendar resource for Elementary English Language Learner:    https://www.teacherspayteachers.com/Product/Calendar-resources-for-Elementary-English-Learners-1722495
Same resource on another store: 
https://www.bilingualmarketplace.com/products/calendar-resources-for-elementary-english-learners?variant=14422675718193
                                      Watch the video:


Collect all kinds of calendar even if they are old to help out during the lesson. Use a real calendar to show the day and months of the year. The calendar helps understand numbers up to 31.  Have the students  identify the days of the week in the calendar and how many days in each month . 

Introduce the days of the week using the cards.

Hand in the cards in random order to seven students that will come to the front. They have to arrange themselves in order.

Ask questions. Teacher: What day is it ?
                         Student: It’s Monday!
         Teacher: Tuesday, come to the front. Show your card.
Teacher: Ursula,What is your favorite day of the week ?
Ursula: It’s Wednesday. (the students with the card shows it to the class).

I made cards to help ordering the days of the week. There are also abbreviation cards. The students order the days of the week and match the correct abbreviation.
Calendar unit printable cards

Introduce the Months of the Year  using the cards. You can also use them for the Birthday unit.


Game: Go to Month.
 Stick the cards on the wall in a random order. Bring a group of students to the middle of the room.

Teacher: January!  The students go  to the  January card and touch it and says the word. Continue with all the other months of the year, or days of the week.

Here the abbreviations  cards for the months. I resarched and there are two ways to abbreviate June and July. I placed both just in case. use the cards to order the months and match the abbreviations.


Continue with the ordinals numbers. There are the numbers and the word cards. 
Students should learn the ordinal numbers for telling dates. Explain that the ordinal numbers are used to express order. Use the cards to play a game connecting the ordinal number and the written form .


Question and answer cards. Prepare the question cards in one colored paper and the answer cards which are the days and months in other colored paper.


Activity 1-You can place the question cards in a bag or facedown in a pile on your desk. Draw a question card and read it to the class. Have the children answer orally or write the answer on their notebooks.

Activity 2- Divide the class into groups . Tell the class that you are thinking of a word , day or month. Star giving some clues.
Teacher: the first letter is J and the last letter is Y.
The students look through the cards and guess the word. The first team to say : JULY, is the winner of a point. Continue with more words.

Also use the ordinal numbers cards  to order the days and the month such as, 1st day of school is Monday, the first month is January.

Explain how to write the date by writing the number of the month  (8), followed by a slash and the number of the day 8/25. Write the date on the board every class.

I made days of the week crowns  for Preschool students, but I guess they might work well for older students. You can use them to help them line up in order as a warm up game.
If you just want the crowns, get them here:    https://www.teacherspayteachers.com/Product/Days-of-The-Week-Crowns-1722398

Pocket charts: I find them useful to review the calendar the whole school year.

I included cute months of the year cards.

Have the students create a calendar for the year. There is a blank clandar template where the students will color and paste their month and write the numbersfor each day as in the year you are doing it. 
Follow me at my Facebook group:   https://www.facebook.com/ESLPreschoolTeachers

sábado, 7 de febrero de 2015

Valentine´s Day Ideas for Elementary ELL


I created this game for my girls so they could match contractions. Get them for free, for a short period of time, there are more Valentine´s printables, including cards. Link:  


I have had this roll the dice game for years, I don´t know the author. Write me an email(ei98srl@gmail.com) and I can send the file. The file comes with the heart template that the students have to trace. Then, they play alone and start drawing as the dice directs  or play in pairs and see who is the first one to complete the Heart Person. 


 A nice book to make to review the structure  I love…..   www.graphicsfromthepond.com.au
          

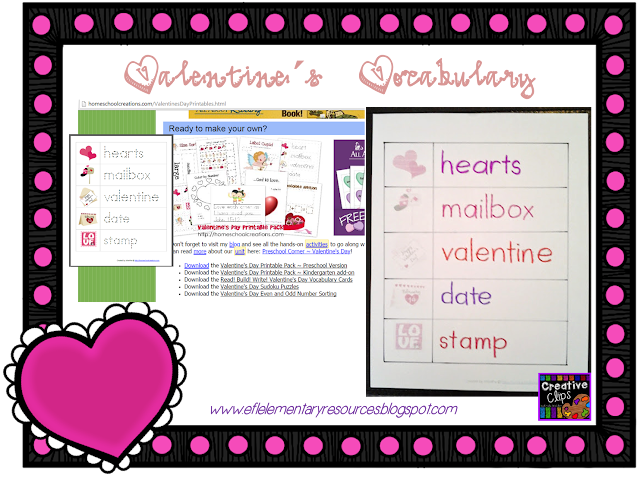
And for Valentine´s Day vocabulary words, a trace activity:


The Teachers Pay Teachers Store has some great resources for free. Here are some of them. 

 Sight words are almost never included in any textbook.   These commonly used words should be  encouraged to memorize and automatically recognized. 
A fun crown for the structure I love….
  
A worksheet for teaching colors:

A cut and paste activity for verbs:

Never miss a Word Search.

Get more ideas  and free files for younger learners at my other blog: 

martes, 27 de enero de 2015

Greetings and Introductions

This is an old resource but many teachers still download it for free.

 Link to the FREE Greeting Unit resource: 
https://www.bilingualmarketplace.com/products/greetings-resources-for-kinder-and-elementary-esl?variant=36125058105508

Watch the video:


Hello !
                  Make some people puppets. It can be paper bag puppets or finger puppets. Send me an Email requesting the templates for these for free.(ei98srl@gmail.com)
Hold them up and have them greet each other, modeling  the expressions: Hi and Hello.
       Have students come to the front of the class and greet them.
       Teacher: Hello, Gabriel. (shake student´s hand.)  Encourage the student to answer.
        Student: Hello, teacher.
Continue greeting students individually. Have other students greet each other.
Write the Word Hello on the board. Read the word aloud as you point to it.  Ask students to read it aloud individually and then chorally. Continue with more greeting expressions.
Here´s my Hello Hand worksheet. After tracing the words, cut the hands and make Greetings puppets.
   Greeting Chain: say Hello to a student. Then have that student say hello to the student sitting behind. Continue, in a chain, until all the students have greeted  and have been greeted.

What´s your name ?
Teach the name structure Using tpr. TPR is a language teaching technique which means Total Physical Response. It coordinates language and movements by giving instructions and the students performing them. It helps with a higher retention of the vocabulary or structures taught and develops language fluency.
Model using gestures as you to convey meaning:
Shrug your shoulders for WHAT ?
Point to the student  for YOUR
Trace a circle on your body  for  NAME or point to the name tag if you made them.

Make a name badge  for you and for your students. Point to your name badge and say your name.

 Point to a student and have him/her stand up and say My 


name´s ______ pointing to his/her name badge.

My name's tags

Game: Ask students as a class: What´s your name? and have them all shout out their names holding up their name tags.

Use the Greeting puppets.
Puppet: Hello ! What´s your name ?
Puppet: Hi! My name´s Ann. What´s your name ?
 Puppet: My name´s Bill.
Two other students can come to the front and role play using their own names. Have the students greet each other by shaking hands, model for them if necessary.
Explain that the longer  version  is My name is and the shorter one is My name´s. Write it on the board. And repeat the dialogue using the longer version.

                                Introduce the people at school: boy, girl, teacher.

Game 2: write the word.
Hi, Hello, boy, girl, What, ´s, is, your , name, my.
Make as many copies as you need for your class. Make groups and hand the letters. Say a word and have the students find the letters and make the word by standing up with the letters in order. Give a point to the first group to do so. I glued each letter onto a craft stick for easy handling.

Students can make a big version of all the words on a big construction paper or a smaller version on their notebooks. Here are the letters in a black and white version. Use the opportunity to review the alphabet by assigning a color to each letter.
Teacher: letter a is blue.
 Students color all the letter a in blue. Continue with more directions.

Gather pictures of famous people or Tv characters that children can relate to. Put any of these pictures on the board and a speech bubble next to it. Write My name´s ______ in the speech bubble. Have students name the character and write the name in speech bubble. Then have students read the  speech bubble.  Continue with all the pictures that you brought to class.
I glued the pictures onto fun foam and a craft stick. For the speech bubble , I printed it onto colored paper, placed clear contact paper and glued onto fun foam and craft stick as well. The, I wrote with a white board marker and erased it with baby wipes.
Use the pictures to introduce His/ Her name is _____. 
What´s his/her name ?

 I created a Name Graph Worksheet as seen on PINnterest.   You can use the larger worksheet as a group letter counting in a name. The smaller sheets are for individual letters in a name counting.
Another worksheet that can be used as a frame for younger learners.
What if children draw you and write your name.
Teacher: What is my name ?
Students: Your name is ______.


There is another blog post with more for the greeeting and Introductions. https://eflelementaryresources.blogspot.com/2023/06/greetings-and-farewwells-resource-this.html